


GROUNDBREAKER
Featuring laser guided plowing action and level grading capability with double linkage. The Tile Drainage Plow offers a solution of improved crop yields and healthier soil throughout all of your fields. From reclaiming non-productive farmland because of inadequate water drainage to increasing the value of the land you currently work; the Tile Plow provides you with a tool for professional and economical water drainage results.
| Model No. | UPP748 | UPP760 | UPT760 |
|---|---|---|---|
| Max depth | 48" | 60" | 60" |
| Tile size | 4" | 4 & 6" | 4 & 6" |
| Max tractor weight | 30,000 | 45,000 | 50,000 |
| Recommended tractor weight | 15,000 - 25,000 lb | 20,000 - 40,000 lb | 25,000 - 45,000 lb |
| Minimum tractor weight | Depends on soil | ||
| Hitch size | CAT 3 | CAT 4 | Draw Bar |
| Number of required remotes | 2 | 2* | 2* |
| Shank material | AR400 | ||
| Undertow weights | 2350 lbs (3000 lbs w/shipping skid) | 4650 lbs (5600 lbs w/shipping skid) |
*Add 1 extra remote for power tile feeder.
How It Works
When it comes to the future of your fields, now is the time to plow ahead.
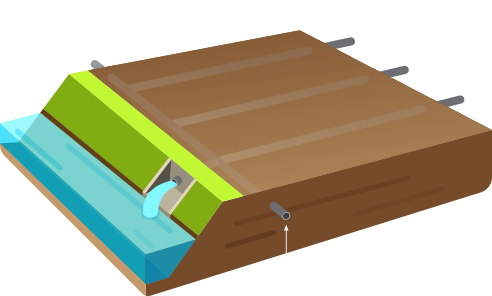
Set up your fields for success – increase crop yields, minimize risk, and improve the overall health of your soil – by installing a water management system for your field. Because excessive water on your fields can lead to stunted roots and plant growth, a decrease in the quality of soil, and difficulty operating equipment in muddy, wet conditions, installing tiles beneath the soil's surface for water to drain into a stream or outlet is the ideal solution.
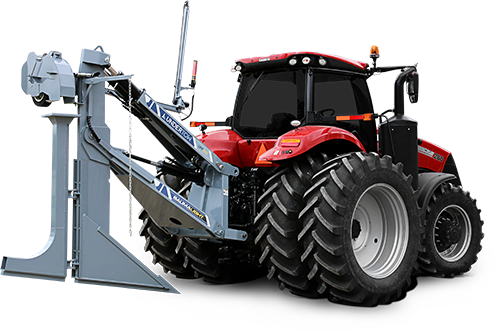
TRACTOR
With your tractor, you can tile when you want. And where you want. Pulling the Undertow with your tractor is easy, allowing you to manage your fields’ tile installation process without the expense of hiring a contractor. With the Undertow attached to your tractor, tile drainage becomes an affordable investment. By following some simple guidelines for set-up, you are in control and can take advantage of the short window of time when soil conditions are optimal for installing the tiles.
SETUP
It pays to plan for the long run. For exceptional tile draining results, undertaking preliminary research and planning is not only highly recommended but also extremely beneficial in the long run. Taking into consideration factors such as topography, elevation, soil type and variety of crops will help determine proper tile depth and spacing, as well as protect the longevity of your tile drainage system. With two options available for plowing – 3-Point Hitch and Draw Bar Plow – setting up the Undertow for tile installation is easy and fast.
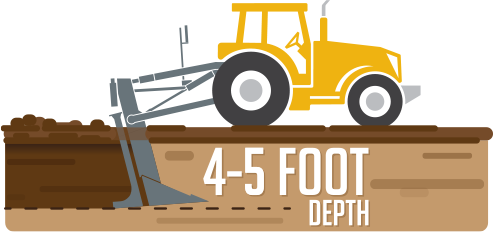
PLOWING ACTION
Plow back your fields. During the tile installation process, the leading-edge design of the Undertow ensures dependable grade control even while plowing to a depth of five feet. Featuring excellent visibility and versatile maneuvering, the Undertow plow can handle a variety of soil conditions and pull consistently hard through the ground.
Getting Started
As a tool that a farmer or landowner can operate without needing a contractor, the Undertow requires only minimal preparation and set up.
1. Site Plan
The first step in a successful drainage plan for your fields begins with a land survey, taking into account your fields' topography, elevation and existing tiles.
2. Material Preparation
When you are ready to begin tiling, ensure you have assembled the required materials. During the tiling process, mark the location of all tile outlets so they are easy to locate in the future.
3. Equipment Set-Up
Following your tractor's operator's manual, attach your tractor the Undertow and connect your hydraulic hoses and laser level. Refer to your Undertow Operator's Manual. When the plow is in the ground, the lift cylinder is in float and the tilt cylinders are in continuous flow. The laser receiver receives the beam from the transmitter and sends the signal to the console in your tractor’s cab. The console then runs the electric over the hydraulic valve on the plow to tilt the boot up or down.
4. Tile Application
When soil conditions are optimal, the Undertow is ready for action. To get started, put the levers for the wheels to lower the plow into float mode. Insert the tile into the boot while the receiver picks up the laser. With the light flashing green, put it in automatic mode. As long as the green light stays on, the plow is following the laser beam. An additional tip during the tiling process: use mains to reduce the number of tile outlets.
5. Post-Installation Tips
A well-installed tile drainage system should last for generations to come. After tile installation, the soil above the tile drain will be loose. It is important to allow rain to settle the loose soil before working in the field, being careful not to use heavy equipment that could pack down the soil. In general, it is imperative to avoid soil compaction. Because it is hard for water to flow through compacted soil to the tile drains, it is critical to avoid working wet land.